本文介绍一种让大语言模型制作幻灯片的实验性思路。通过定义一套极简的 XML 标签语言 SlideML,让模型输出页面描述,再由确定性渲染引擎真实绘制,并利用测量到的实际数据回传给模型,形成一轮一轮的调整优化。
这篇博客来自我的一个实验性想法:让 AI 参与 PPT 制作时,不直接输出最终文件,而是用一套简单的标记语言描述页面,然后由程序准确地画出来,同时把真实排版后的数据告诉 AI,帮助它在下一次尝试时调整得更精确
这是一个实验性的想法,希望文中的设计和代码能够激发你的灵感。你可以在博客末尾找到完整源码的下载方法,拉取后替换为自己的模型就能直接跑起来看效果,如果你对此感兴趣却没有模型可以实验的话,也可以发邮件私聊我借账号
本文内容由人类主导 AI 辅助编写
核心理念:让模型直接看结果
大语言模型在排版时天然缺少实际渲染排版的结果预期。比如字体度量信息,它不知道一段文本在某个宽度下会折成几行、实际占据的高度是多少。我们的思路简单直接:不让模型猜,而是提供一个精确的测量助手。
- 模型用 SlideML 描述页面内容。可以只给定一部分约束,剩余元素信息依靠布局和渲染引擎进行信息填充,比如对于文本,可以只写
Width约束宽度,高度不写,然后依靠排版引擎回填具体的文本排版高度 - 确定性渲染引擎拿到描述后,用真实的字体和字号对文本进行排版,得到实际行数和像素高度。
- 引擎把
ActualWidth、ActualHeight、ActualLineCount这些真实值填回 XML 里,返回给模型。返回给到模型时,还会包含可能存在的警告信息,比如溢出画布等情况 - 模型看到反馈数据,发现溢出了,下一轮就可以把字号改小,或者把容器高度加大。
模型只管设计意图,引擎负责告诉它精确结果。如果模型支持多模态,甚至可以将渲染截图一起送回,连“间距不太协调”这类主观感觉也能被纠正。
我的想法是不要追求模型一次性将事情做对,而是要进行一轮轮迭代。迭代过程中还可以有人类参与,人类可以看着渲染出来的结果进行反馈,重复地让模型进行优化
SlideML 的极简元素
为了模型能轻松掌握而不产生幻觉,SlideML 只保留幻灯片排版最核心的几种元素,刻意压低了概念数量,总共 20 个左右属性。
大概一份 SlideML 的界面的代码如下:
<Page Background="#F5F5F5"> <Panel Id="top-bar" X="0" Y="0" Width="1280" Height="80" Background="#1A1A2E" Padding="32"> <TextElement Id="logo" X="0" Y="20" Text="SlideML" FontName="Arial" FontSize="24" Foreground="#FFFFFF" /> </Panel> <TextElement Id="main-title" X="80" Y="140" Width="1120" Text="让大语言模型生成幻灯片" FontSize="48" Foreground="#1A1A2E" TextAlignment="Center" /> <Panel Id="cards-row" X="80" Y="260" Width="1120" Height="320"> <Rect Id="card1" X="0" Y="0" Width="340" Height="320" Fill="#FFFFFF" CornerRadius="12" Stroke="#E8E8E8" StrokeThickness="1" /> <TextElement Id="card1-title" X="24" Y="24" Width="292" Text="定义标签" FontSize="22" Foreground="#333" /> <!-- 其余卡片类似,此处省略 --> </Panel></Page>Page 画布
根元素,画布固定 1280×720。
<Page Background="#FFFFFF"> ...</Page>Panel 容器
用于分组和嵌套,子元素相对于它的左上角定位。
<Panel Id="header" X="0" Y="0" Width="1280" Height="120" Padding="24" Background="#1A1A2E"> ...</Panel>Rect 矩形
绘制卡片、色块等几何形状,支持圆角和描边。
<Rect Id="card" X="40" Y="160" Width="380" Height="280" Fill="#FFFFFF" Stroke="#E0E0E0" StrokeThickness="1" CornerRadius="8" Opacity="1.0" />TextElement 文本
核心元素,Text 属性必填。一旦指定了 Width,引擎会在此宽度内自动换行,并返回真实的尺寸数据。
<TextElement Id="title" X="60" Y="180" Width="340" Text="一段可能会换行的文本" FontName="Microsoft YaHei" FontSize="29" Foreground="#1A1A2E" LineHeight="1.4" />Image 图片
通过 Source 给出资源 ID 而非实际路径。图片来源由上游系统(如 RAG 检索、图库等)在生成后解决,不干扰 XML 结构。
<Image Id="hero" X="800" Y="160" Width="400" Height="400" Source="img_hero_001" Stretch="Uniform" />实现解析
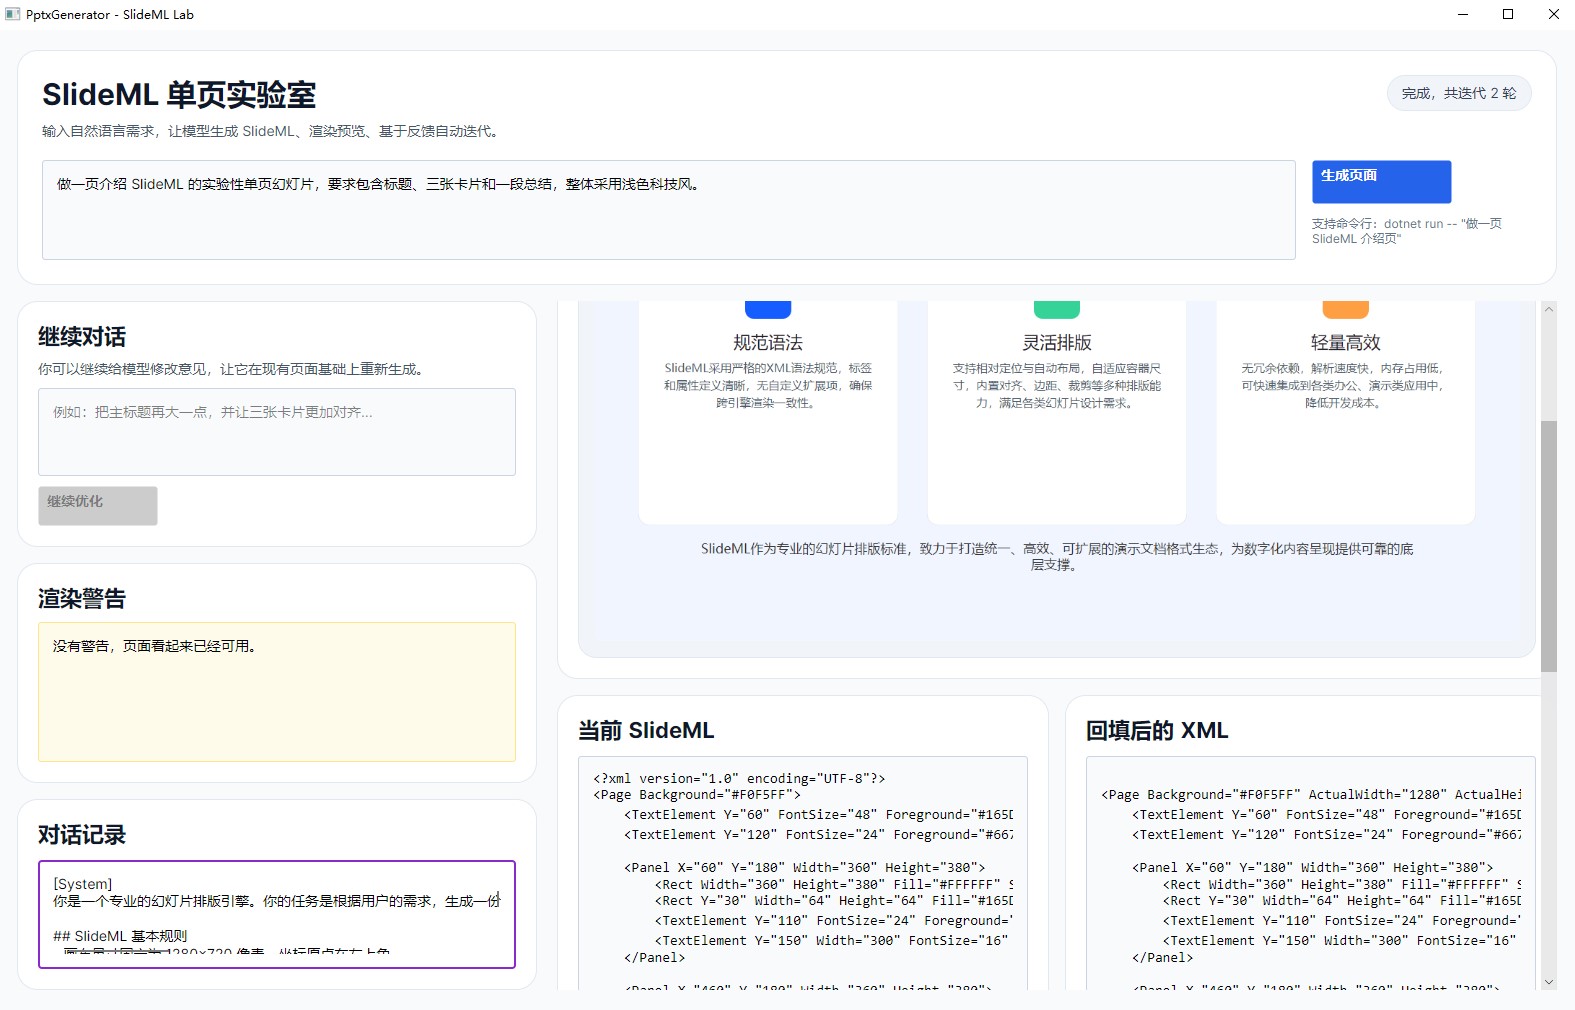
实现部分使用 C# 编写,基于 Avalonia 做出简洁的预览界面和渲染引擎,并通过 Microsoft.Agents.AI.OpenAI 连接大模型。整体流程是:用户提出需求 → 模型输出 SlideML → 解析器转换成元素树 → 渲染器布局、绘制并回填数据 → 模型根据反馈再次修改 XML。
下图是运行时的界面,包含渲染预览,和展示回填后的 XML 和警告信息。
提示词:怎么让模型学会 SlideML
要让模型稳定输出符合规范的 XML,需要非常细致的指令。提示词分成两部分:系统提示词(规则手册)和用户提示词(当前任务)。
系统提示词完整定义了所有标签、属性、排版规则和禁止事项。下面摘录部分内容,足以看清其结构:
你是一个专业的幻灯片排版引擎。根据用户需求,生成一份 SlideML 格式的 XML 文档。
## SlideML 基本规则- 画布尺寸固定为 1280x720 像素,坐标原点在左上角- 所有尺寸单位为 px(不写单位),颜色格式为 #RRGGBB 或 #AARRGGBB- 标签必须严格遵守定义,不要创造新标签或新属性
## 标签与属性### Page属性: Background(背景色,可选,默认 #FFFFFF)### Panel属性: X, Y, Width, Height(均可选), Padding(可选,默认 0), Background(可选)### Rect属性: X, Y, Width, Height(均可选), Fill, Stroke, StrokeThickness, CornerRadius, ...### TextElement属性: X, Y, Width, Height(均可选), Text(必填), FontName, FontSize, ...### Image属性: X, Y, Width, Height(均可选), Source(必填,图片资源ID), Stretch, ...
## 禁止事项- 不要写 ActualWidth、ActualHeight、ActualLineCount 属性- 不要创造未定义的标签或属性- 不要使用 XAML、CSS、HTML 等其他语法
用户提示词根据场景动态构建。初次生成时,将用户需求嵌入模板,要求模型输出浅色主题、层级清晰、留白充足的单页:
private static string BuildInitialUserPrompt(string userPrompt){    return $"""请根据以下需求生成单页 SlideML:
{userPrompt}
要求:1. 尽量使用浅色主题,视觉清爽2. 标题、副标题、正文层级明显3. 页面内容要适合 1280x7204. 如果需要图片,可以使用占位资源 ID,如 image_0015. 只输出 XML""";}
当需要迭代时,用户提示词会把原始需求、当前 XML 以及新的修改意见一起灌入,让模型重新输出完整文档:
private static string BuildContinuationPrompt(string originalPrompt, string currentSlideXml, string userMessage){ return $"""这是一个正在迭代中的 SlideML 单页实验。原始需求:{originalPrompt}当前版本 XML:{currentSlideXml}用户新的修改意见:{userMessage}请综合原始需求和新的修改意见,输出一份完整的、可直接渲染的新版 SlideML XML。只输出 XML。""";}解析器:从 XML 到结构化数据
解析器 SlideMlParser 是整个链条的第一步,它不关心布局,只把模型输出的 XML 字符串转成强类型的元素对象树。
入口方法 Parse 收到一段 XML 后,先做基本校验:必须能正确解析,根元素必须是 Page。随后取出 Background 属性(缺省用白色),再遍历根元素下的所有子节点,逐一交给 ParseElement 处理。
public SlidePage Parse(string xml){ var document = XDocument.Parse(xml); var root = document.Root; var page = new SlidePage { Background = GetOptionalString(root, "Background") ?? "#FFFFFF", }; foreach (var child in root.Elements()) { page.Children.Add(ParseElement(child)); } return page;}ParseElement 是一个分发方法,根据标签名调用对应的构造逻辑。同时,它会自动为没有 Id 的元素生成一个唯一标识,格式为 elem_001 这种,便于后续追踪。
private SlideElement ParseElement(XElement element){ var id = GetOptionalString(element, "Id") ?? $"elem_{_nextId++:000}"; return element.Name.LocalName switch { "Panel" => ParsePanel(element, id), "Rect" => ParseRect(element, id), "TextElement" => ParseTextElement(element, id), "Image" => ParseImageElement(element, id), _ => throw new InvalidOperationException($"不支持的标签: {element.Name.LocalName}") };}以 TextElement 为例,解析时会逐项提取属性。Text 为必填,缺失则直接报错。其他可选属性都有合理的默认值,例如字体默认为 Microsoft YaHei,字号默认 16,行高默认 1.2,颜色默认黑色等。这种容错设计让模型即使偶尔漏写一些属性,引擎也能顺利工作。
private SlideTextElement ParseTextElement(XElement element, string id){    var text = GetOptionalString(element, "Text");    if (string.IsNullOrWhiteSpace(text))        throw new InvalidOperationException($"TextElement({id}) 必须包含 Text 属性。");
    return new SlideTextElement    {        Id = id,        X = GetOptionalDouble(element, "X"),        Y = GetOptionalDouble(element, "Y"),        Width = GetOptionalDouble(element, "Width"),        Height = GetOptionalDouble(element, "Height"),        Text = text,        FontName = GetOptionalString(element, "FontName") ?? "Microsoft YaHei",        FontSize = GetOptionalDouble(element, "FontSize") ?? 16,        Foreground = GetOptionalString(element, "Foreground") ?? "#000000",        TextAlignment = GetOptionalTextAlignment(element) ?? SlideTextAlignment.Left,        LineHeight = GetOptionalDouble(element, "LineHeight") ?? 1.2,        Opacity = GetOptionalDouble(element, "Opacity") ?? 1,    };}
ParsePanel 稍有不同,它在设置完自身属性后,会递归调用 ParseElement 来处理其内部的所有子元素,从而构建出树的任意深度嵌套。其他如 ParseRect、ParseImage 的模式类似,都是利用辅助方法 GetOptionalString、GetOptionalDouble 以及一系列 GetOptionalXXXAlignment 来完成属性读取,使得整个解析器结构工整、容易扩展。
渲染器:测量、绘制与反馈
SlideRenderer 是确定性渲染引擎的核心,负责将解析后的元素树在 1280×720 画布上精确布局、绘制,并将实际测量到的尺寸回填,供大模型下一轮迭代参考。
解析器输出的是一棵由 SlideElement 派生类组成的树。SlideElement 是所有元素的基类,它携带了 Id、X、Y、Width、Height、Opacity 以及 HorizontalAlignment / VerticalAlignment 等可选属性。布局阶段不会修改这些构造属性,只会填充四个运行时字段:
LocalBounds:元素在自身坐标系中的区域(左上角通常为(0,0))。LayoutBounds:元素在父容器坐标系中的最终位置和大小。ActualWidth、ActualHeight:布局后实际占用的像素尺寸。
具体派生关系如下:
SlidePage是根节点,含背景色和子元素列表。SlidePanelElement增加Padding、背景色以及自己的子元素列表。SlideRectElement带有填充、描边和圆角。SlideTextElement除了字体、字号、行高等文本属性外,还有一个引擎写入的ActualLineCount(实际行数)和一个TextLayout对象。SlideImageElement有图片源和拉伸模式。
渲染结果被封装进 SlideRenderResult,它包含原始输入 XML、回填了实际尺寸的输出 XML、警告列表和预览位图。
渲染入口:RenderAsync
整个渲染流程在 RenderAsync 中编排,其步骤为:清洗 XML → 解析为元素树 → 布局 → 绘制 → 回填实际数据。
public async Task<SlideRenderResult> RenderAsync(string slideXml, CancellationToken ct){    var normalizedXml = SlideXmlUtilities.NormalizeXml(SlideXmlUtilities.ExtractXml(slideXml));    var page = _parser.Parse(normalizedXml);    var warnings = new List<string>();
    var previewBitmap = await Dispatcher.UIThread.InvokeAsync(() =>    {        LayoutChildren(page.Children, page.LayoutBounds, warnings, "Page", clipToParent: false);        var bitmap = new RenderTargetBitmap(new PixelSize(CanvasWidth, CanvasHeight));        using (var ctx = bitmap.CreateDrawingContext())        {            ctx.FillRectangle(CreateBrush(page.Background, Colors.White),                new Rect(0, 0, CanvasWidth, CanvasHeight));            DrawElements(ctx, page.Children, warnings);        }        return bitmap;    });
    var renderedXml = SlideXmlUtilities.FormatRenderedXml(normalizedXml,        id => FindMetrics(page, id));    return new SlideRenderResult    {        InputXml = normalizedXml,        OutputXml = renderedXml,        Warnings = warnings,        PreviewBitmap = previewBitmap,    };}
布局引擎:两遍测量与自动包裹
布局由 LayoutChildren 发起,它对每个子元素按类型分发到 LayoutPanel、LayoutRect、LayoutText 或 LayoutImage。
Panel:自动尺寸与对齐
Panel 的布局是最复杂的部分,因为它需要根据子元素的内容自动决定自己的尺寸。我把整个过程拆成五个步骤来解释。
第一步:确定初猜的内容区域。 如果 Panel 显式指定了 Width 或 Height,就直接使用它们;否则使用父容器可用空间减去 Padding 作为初猜尺寸。
第二步:用初猜区域对子元素做一次预备布局。 这步的目的是让所有子元素先自己计算一遍,从而得到它们实际占据的范围。
第三步:收集子元素的边界,算出 Panel 的真实宽高。 遍历所有子元素的 LocalBounds,找出最大的 Right 和最下的 Bottom,再加上 Padding,就得到了 Panel 应有的 ActualWidth 和 ActualHeight。
第四步:根据真实尺寸确定 Panel 在父容器中的位置。 这里使用统一的 ResolveOrigin 方法,它同时处理显式坐标(X/Y)和对齐关键字(HorizontalAlignment/VerticalAlignment)。
第五步:用真实的最终内容区域,对子元素进行第二次正式布局。 这保证了子元素拿到的父容器坐标系是准确的。
关键代码片段——ResolveOrigin 的实现非常简洁:
private static double ResolveOrigin(double parentOrigin, double parentSize, double elementSize, double? explicitOffset, SlideHorizontalAlignment? alignment){ if (explicitOffset is double x) return parentOrigin + x; return alignment switch { SlideHorizontalAlignment.Center => parentOrigin + Math.Max(0, (parentSize - elementSize) / 2), SlideHorizontalAlignment.Right => parentOrigin + Math.Max(0, parentSize - elementSize), _ => parentOrigin, };}完整的 LayoutPanel 方法会在本小节的末尾贴出,方便需要时对照。
文本测量:真实排版反馈
LayoutText 是闭环运转的核心,它也遵循类似的步骤。
第一步:创建 Avalonia 的 TextLayout 对象。 这里会根据文本的字体、字号、约束宽度等参数,构造一个真正的排版对象。如果文本指定了 Width,则换行模式设为 TextWrapping.Wrap,否则为 NoWrap。
第二步:从排版结果读取真实尺寸。 TextLayout 的 WidthIncludingTrailingWhitespace 和 Height 给出了精确的像素值。同时,TextLines.Count 就是实际的行数。这些值直接回填到元素上。
第三步:定位元素并处理溢出警告。 如果模型在 XML 中指定了固定的 Height,但文本实际排版的高度超出了它,引擎会根据平均行高算出当前容器最多能容纳多少行,然后生成一条清晰的警告。
这个过程中最核心的是 TextLayout 的创建和测量,其余定位逻辑和 Panel 一样使用 ResolveOrigin。
// 创建排版对象的关键代码var textLayout = new TextLayout( text.Text, typeface, text.FontSize, foreground, MapTextAlignment(text.TextAlignment), text.Width is null ? TextWrapping.NoWrap : TextWrapping.Wrap, TextTrimming.None, null, FlowDirection.LeftToRight, maxWidth, maxHeight, lineHeight, 0, 0);布局阶段完整代码参考
以下是 LayoutPanel 和 LayoutText 的完整实现,读者可以结合上面的分解说明对照阅读。
private static void LayoutPanel(SlidePanelElement panel, Rect parentBounds,    List<string> warnings, string parentId, bool clipToParent){    var provisionalWidth = panel.Width ?? Math.Max(0, parentBounds.Width - panel.Padding * 2);    var provisionalHeight = panel.Height ?? Math.Max(0, parentBounds.Height - panel.Padding * 2);    var initialOrigin = new Point(parentBounds.X + (panel.X ?? 0) + panel.Padding,                                  parentBounds.Y + (panel.Y ?? 0) + panel.Padding);    var provisionalBounds = new Rect(initialOrigin.X, initialOrigin.Y,                                     provisionalWidth, provisionalHeight);
    LayoutChildren(panel.Children, provisionalBounds, warnings, panel.Id, clipToParent: true);
    double contentRight = 0, contentBottom = 0;    foreach (var child in panel.Children)    {        contentRight = Math.Max(contentRight, child.LocalBounds.Right);        contentBottom = Math.Max(contentBottom, child.LocalBounds.Bottom);    }
    var actualWidth = panel.Width ?? (contentRight + panel.Padding * 2);    var actualHeight = panel.Height ?? (contentBottom + panel.Padding * 2);
    var originX = ResolveOrigin(parentBounds.X, parentBounds.Width, actualWidth,                                panel.X, panel.HorizontalAlignment);    var originY = ResolveOrigin(parentBounds.Y, parentBounds.Height, actualHeight,                                panel.Y, panel.VerticalAlignment);
    panel.LocalBounds = new Rect(0, 0, actualWidth, actualHeight);    panel.LayoutBounds = new Rect(originX, originY, actualWidth, actualHeight);    panel.ActualWidth = actualWidth;    panel.ActualHeight = actualHeight;
    var finalContentBounds = new Rect(originX + panel.Padding, originY + panel.Padding,        Math.Max(0, actualWidth - panel.Padding * 2),        Math.Max(0, actualHeight - panel.Padding * 2));    LayoutChildren(panel.Children, finalContentBounds, warnings, panel.Id, clipToParent: true);
    ValidateBounds(panel, parentBounds, warnings, parentId, clipToParent);}
private static void LayoutText(SlideTextElement text, Rect parentBounds,    List<string> warnings, string parentId, bool clipToParent){    var foreground = CreateBrush(text.Foreground, Colors.Black);    var typeface = new Typeface(new FontFamily(text.FontName));    var maxWidth = text.Width ?? 10000;    var maxHeight = text.Height ?? 10000;    var lineHeight = text.FontSize * text.LineHeight;
    var textLayout = new TextLayout(        text.Text, typeface, text.FontSize, foreground,        MapTextAlignment(text.TextAlignment),        text.Width is null ? TextWrapping.NoWrap : TextWrapping.Wrap,        TextTrimming.None, null, FlowDirection.LeftToRight,        maxWidth, maxHeight, lineHeight, 0, 0);
    var measuredWidth = text.Width ?? textLayout.WidthIncludingTrailingWhitespace;    var measuredHeight = text.Height ?? textLayout.Height;    text.TextLayout = textLayout;    text.ActualLineCount = textLayout.TextLines.Count;
    text.LocalBounds = new Rect(text.X ?? 0, text.Y ?? 0, measuredWidth, measuredHeight);
    var originX = ResolveOrigin(parentBounds.X, parentBounds.Width, measuredWidth,                                text.X, text.HorizontalAlignment);    var originY = ResolveOrigin(parentBounds.Y, parentBounds.Height, measuredHeight,                                text.Y, text.VerticalAlignment);    text.LayoutBounds = new Rect(originX, originY, measuredWidth, measuredHeight);    text.ActualWidth = measuredWidth;    text.ActualHeight = measuredHeight;
    if (text.Height is double fixedHeight && textLayout.Height > fixedHeight + 0.1)    {        var averageLineHeight = textLayout.TextLines.Count == 0            ? lineHeight            : textLayout.Height / textLayout.TextLines.Count;        var visibleLineCount = averageLineHeight <= 0            ? 0            : Math.Max(0, (int)Math.Floor(fixedHeight / averageLineHeight));        warnings.Add($"[Warning] {text.Id}: ActualLineCount={text.ActualLineCount}," +                     $"超出容器高度(当前高度仅容纳 {visibleLineCount} 行)");    }
ValidateBounds(text, parentBounds, warnings, parentId, clipToParent);}你可能已经注意到,LayoutPanel 中 LayoutChildren 被调用了两次。第一次调用使用的是预先猜测的 provisionalBounds,目的是让每一个子元素先自由布局一遍,引擎借此收集所有子元素实际占据的内容边界(最大 Right 和 Bottom)。第二次调用使用的是 Panel 自身尺寸最终确定后的 finalContentBounds,此时子元素拿到的父容器坐标系才是精确的,这样才能保证后续的定位、对齐和裁剪完全准确。这种“先测量内容、再确定自身、最后正式布局”的两遍机制,正是 Panel 能够根据内容自动调整大小的核心,也让模型不用操心容器的确切高度,只需声明设计意图,引擎就会回填真实的度量数据。
绘制:顺序遍历与分派
布局完成后,DrawElements 遍历所有元素,根据类型调用对应的绘制方法。整个过程非常简单——没有深度重排,完全按照元素在树中的顺序绘制。需要注意的一点是,每个元素在绘制前都会用 PushOpacity 包装,以支持透明度。
private static void DrawElements(DrawingContext context,    IReadOnlyList<SlideElement> elements, List<string> warnings){    foreach (var element in elements)    {        DrawElement(context, element, warnings);    }}
private static void DrawElement(DrawingContext context, SlideElement element,    List<string> warnings){    using var opacity = context.PushOpacity(ClampOpacity(element.Opacity));
    switch (element)    {        case SlidePanelElement panel:            DrawPanel(context, panel, warnings);            break;        case SlideRectElement rect:            DrawRect(context, rect);            break;        case SlideTextElement text:            DrawText(context, text);            break;        case SlideImageElement image:            DrawImage(context, image);            break;    }}
下面分别说明每种元素的绘制细节。
Panel
Panel 首先绘制自己的背景色(如果有),然后用 PushClip 将绘制区域裁剪为自身的 LayoutBounds,再递归绘制内部的子元素。这就实现了“超出部分不可见”的效果。
private static void DrawPanel(DrawingContext context, SlidePanelElement panel,    List<string> warnings){    if (!string.IsNullOrWhiteSpace(panel.Background))    {        context.DrawRectangle(CreateBrush(panel.Background, Colors.Transparent),            null, panel.LayoutBounds);    }
    using var clip = context.PushClip(panel.LayoutBounds);    DrawElements(context, panel.Children, warnings);}
Rect
矩形支持圆角、填充和描边。CornerRadius 大于 0 时会用 RoundedRect 来绘制。
private static void DrawRect(DrawingContext context, SlideRectElement rect){    var fill = string.IsNullOrWhiteSpace(rect.Fill)        ? null        : CreateBrush(rect.Fill, Colors.Transparent);    var pen = string.IsNullOrWhiteSpace(rect.Stroke) || rect.StrokeThickness <= 0        ? null        : new Pen(CreateBrush(rect.Stroke, Colors.Transparent), rect.StrokeThickness);
    if (rect.CornerRadius > 0)    {        context.DrawRectangle(fill, pen,            new RoundedRect(rect.LayoutBounds, rect.CornerRadius));    }    else    {        context.DrawRectangle(fill, pen, rect.LayoutBounds);    }}
Text
文本直接用布局阶段已经创建好的 TextLayout 进行绘制。如果文本指定了固定高度,而实际高度超过了它,绘制时会先用 PushClip 裁剪,避免文本越界。
private static void DrawText(DrawingContext context, SlideTextElement text){    if (text.TextLayout is null) return;
    if (text.Height is double fixedHeight)    {        using var clip = context.PushClip(new Rect(            text.LayoutBounds.X, text.LayoutBounds.Y,            text.LayoutBounds.Width, fixedHeight));        text.TextLayout.Draw(context, text.LayoutBounds.TopLeft);    }    else    {        text.TextLayout.Draw(context, text.LayoutBounds.TopLeft);    }}
Image
图片绘制分为两种情况:成功加载的图片会根据 Stretch 属性计算目标矩形;加载失败的图片则绘制一个带边框的占位框,并显示图片的资源 ID 作为提示。
private static void DrawImage(DrawingContext context, SlideImageElement image){    var bounds = image.LayoutBounds;    if (image.Bitmap is { } bitmap)    {        var sourceSize = bitmap.Size;        var sourceRect = new Rect(0, 0, sourceSize.Width, sourceSize.Height);        var destRect = CalculateImageDestination(bounds, sourceRect, image.Stretch);        context.DrawImage(bitmap, sourceRect, destRect);        return;    }
    // 加载失败时绘制占位框    context.DrawRectangle(        new SolidColorBrush(Color.Parse("#FFF8FAFC")),        new Pen(new SolidColorBrush(Color.Parse("#FFCBD5E1")), 1),        new RoundedRect(bounds, 12));
    // 在占位框内绘制资源 ID    var titleLayout = new TextLayout(        "Image",        new Typeface(new FontFamily("Microsoft YaHei")),        22,        new SolidColorBrush(Color.Parse("#FF64748B")),        TextAlignment.Center,        TextWrapping.NoWrap,        TextTrimming.None, null, FlowDirection.LeftToRight,        bounds.Width, 48, 28, 0, 1);    var sourceLayout = new TextLayout(        image.Source,        new Typeface(new FontFamily("Microsoft YaHei")),        14,        new SolidColorBrush(Color.Parse("#FF94A3B8")),        TextAlignment.Center,        TextWrapping.Wrap,        TextTrimming.CharacterEllipsis, null, FlowDirection.LeftToRight,        Math.Max(0, bounds.Width - 32), Math.Max(0, bounds.Height - 80),        18, 0, 2);
    titleLayout.Draw(context,        new Point(bounds.X, bounds.Y + Math.Max(16, bounds.Height * 0.32)));    sourceLayout.Draw(context,        new Point(bounds.X + 16, bounds.Y + Math.Max(48, bounds.Height * 0.32 + 36)));}
边界校验:把问题说得明明白白
每个元素布局完成后,ValidateBounds 会检查 LayoutBounds 是否超出 1280×720 画布,以及是否溢出父容器(当 clipToParent 为 true 时)。每一条警告都带有元素 Id 和精确的像素值,方便大模型直接定位修正。
private static void ValidateBounds(SlideElement element, Rect parentBounds,    List<string> warnings, string parentId, bool clipToParent){    var bounds = element.LayoutBounds;
    if (bounds.Right > CanvasWidth)        warnings.Add($"[Warning] {element.Id}: 元素右边界 X={bounds.Right:F2} 超出画布宽度 {CanvasWidth}");    if (bounds.Bottom > CanvasHeight)        warnings.Add($"[Warning] {element.Id}: 元素下边界 Y={bounds.Bottom:F2} 超出画布高度 {CanvasHeight}");    if (bounds.X < 0)        warnings.Add($"[Warning] {element.Id}: 元素左边界 X={bounds.X:F2} 超出画布左侧 0");    if (bounds.Y < 0)        warnings.Add($"[Warning] {element.Id}: 元素上边界 Y={bounds.Y:F2} 超出画布顶部 0");
    if (clipToParent && !parentBounds.Contains(bounds))        warnings.Add($"[Warning] {element.Id}: 元素超出父容器 {parentId},超出部分将被裁剪");}
回填实际尺寸到 XML
所有绘制和警告收集完毕后,FindMetrics 递归遍历元素树,根据 Id 取出 ActualWidth、ActualHeight 和 ActualLineCount,再由 SlideXmlUtilities.FormatRenderedXml 将它们作为新属性插回原始 XML。最终返回给模型的 OutputXml 类似这样:
<TextElement Id="title" X="60" Y="180" Width="340" Text="..." ActualWidth="340" ActualHeight="87" ActualLineCount="2" />配合带精确数值的警告列表,大模型可以在下一轮中精准地调整布局参数。
具体做法是在 SlideXmlUtilities 里面重新解析原始文档,遍历所有带有 Id 的元素,从 metricsProvider 中取出对应的度量,然后通过 SetAttributeValue 精确追加 ActualWidth 等属性。核心代码如下:
internal static class SlideXmlUtilities{    public static string FormatRenderedXml(string xml, Func<string, SlideRenderedMetrics?> metricsProvider)    {        var document = XDocument.Parse(xml, LoadOptions.PreserveWhitespace);        var root = document.Root;        root.SetAttributeValue("ActualWidth", FormatNumber(SlideRenderer.CanvasWidth));        root.SetAttributeValue("ActualHeight", FormatNumber(SlideRenderer.CanvasHeight));
        foreach (var element in root.DescendantsAndSelf().Where(            t => t.Name.LocalName is "Page" or "Panel" or "Rect" or "TextElement" or "Image"))        {            var id = (string?)element.Attribute("Id");            if (string.IsNullOrWhiteSpace(id)) continue;
            var metrics = metricsProvider(id);            if (metrics is null) continue;
            element.SetAttributeValue("ActualWidth", FormatNumber(metrics.ActualWidth));            element.SetAttributeValue("ActualHeight", FormatNumber(metrics.ActualHeight));            if (metrics.ActualLineCount is not null)                element.SetAttributeValue("ActualLineCount", metrics.ActualLineCount.Value);            else                element.Attribute("ActualLineCount")?.Remove();        }        return document.ToString();    }}
完整示例
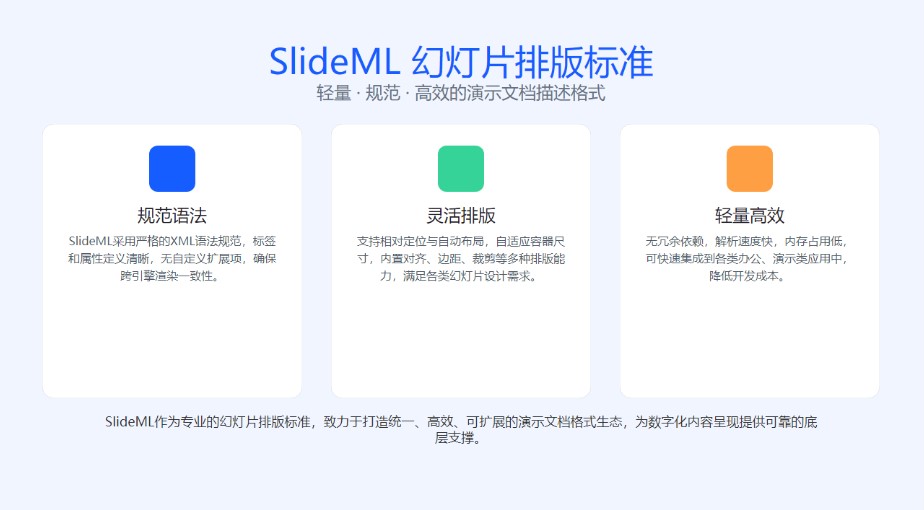
下面是一份完整的 SlideML 单页,包含顶栏、主标题和三张卡片,直观展示了它的结构和表现力。
<Page Background="#F5F9FF">    <TextElement X="0" Y="60" Width="1280" Text="SlideML 幻灯片排版引擎" FontSize="36" Foreground="#1A365D" TextAlignment="Center" />    <TextElement X="0" Y="110" Width="1280" Text="轻量 · 规范 · 高效的幻灯片描述标准" FontSize="20" Foreground="#4A6FA5" TextAlignment="Center" />
    <Panel X="60" Y="170" Width="350" Height="400">        <Rect X="0" Y="0" Width="350" Height="400" Fill="#FFFFFF" Stroke="#E0E9F8" StrokeThickness="1" CornerRadius="16" />        <Rect X="143" Y="30" Width="64" Height="64" Fill="#E1F0FF" CornerRadius="32" />        <TextElement X="143" Y="30" Width="64" Height="64" Text="规" FontSize="32" Foreground="#4080FF" TextAlignment="Center" VerticalAlignment="Center" />        <TextElement X="0" Y="110" Width="350" Text="规范语法" FontSize="24" Foreground="#1A365D" TextAlignment="Center" />        <TextElement X="30" Y="160" Width="290" Text="严格遵循XML语法规范,标签属性定义清晰,无自定义扩展内容,确保跨引擎渲染结果高度一致。" FontSize="16" Foreground="#555555" LineHeight="1.5" TextAlignment="Center" />    </Panel>
    <Panel X="465" Y="170" Width="350" Height="400">        <Rect X="0" Y="0" Width="350" Height="400" Fill="#FFFFFF" Stroke="#E0E9F8" StrokeThickness="1" CornerRadius="16" />        <Rect X="143" Y="30" Width="64" Height="64" Fill="#E6FFFA" CornerRadius="32" />        <TextElement X="143" Y="30" Width="64" Height="64" Text="活" FontSize="32" Foreground="#00B42A" TextAlignment="Center" VerticalAlignment="Center" />        <TextElement X="0" Y="110" Width="350" Text="灵活排版" FontSize="24" Foreground="#1A365D" TextAlignment="Center" />        <TextElement X="30" Y="160" Width="290" Text="支持绝对定位与智能对齐属性,自动适配内容尺寸,多层级容器嵌套可满足各类复杂布局需求。" FontSize="16" Foreground="#555555" LineHeight="1.5" TextAlignment="Center" />    </Panel>
    <Panel X="870" Y="170" Width="350" Height="400">        <Rect X="0" Y="0" Width="350" Height="400" Fill="#FFFFFF" Stroke="#E0E9F8" StrokeThickness="1" CornerRadius="16" />        <Rect X="143" Y="30" Width="64" Height="64" Fill="#F9F0FF" CornerRadius="32" />        <TextElement X="143" Y="30" Width="64" Height="64" Text="效" FontSize="32" Foreground="#722ED1" TextAlignment="Center" VerticalAlignment="Center" />        <TextElement X="0" Y="110" Width="350" Text="高效产出" FontSize="24" Foreground="#1A365D" TextAlignment="Center" />        <TextElement X="30" Y="160" Width="290" Text="结构化描述方式易读易写,可通过代码批量生成,大幅提升批量幻灯片内容的生产效率。" FontSize="16" Foreground="#555555" LineHeight="1.5" TextAlignment="Center" />    </Panel>
    <TextElement X="60" Y="600" Width="1160" Text="SlideML 致力于打造标准化的幻灯片内容协议,打通设计、开发、自动化生成全链路,为大规模演示内容生产提供可靠的底层支持。" FontSize="18" Foreground="#333333" TextAlignment="Center" LineHeight="1.5" /></Page>
注: 明明 DSL 里面定义是没有圆形的,为什么能画出圆形的图形出来?其实这只是巧妙地利用了圆角矩形的特点,当圆角半径设置得足够大,达到矩形宽度或高度的一半时,矩形本身就会被圆角完全“吃掉”,视觉上自然就是一个完美的圆形
代码
本博客的完整源代码放在 github 和 gitee 上。我的整个代码仓库较大,你可以使用如下命令只拉取这部分内容,速度比较快。
先创建一个空文件夹,用命令行 cd 进入,然后执行:
git initgit remote add origin https://gitee.com/lindexi/lindexi_gd.gitgit pull origin 95309d0c3d86822c27310910333b0e8aec62b655如果 gitee 无法访问,请切换到 github 源:
git remote remove origingit remote add origin https://github.com/lindexi/lindexi_gd.gitgit pull origin 95309d0c3d86822c27310910333b0e8aec62b655取得代码后,进入 Pptx/PptxGenerator 目录,在 ChatClientCreator 中填入你自己的模型 Key 和端点,即可运行体验。
更多技术博客,请参阅 博客导航

本作品采用 知识共享署名-非商业性使用-相同方式共享 4.0 国际许可协议 进行许可。 欢迎转载、使用、重新发布,但务必保留文章署名 林德熙 (包含链接: https://blog.lindexi.com ),不得用于商业目的,基于本文修改后的作品务必以相同的许可发布。如有任何疑问,请与我 联系。